 Pile 'o Gaskets
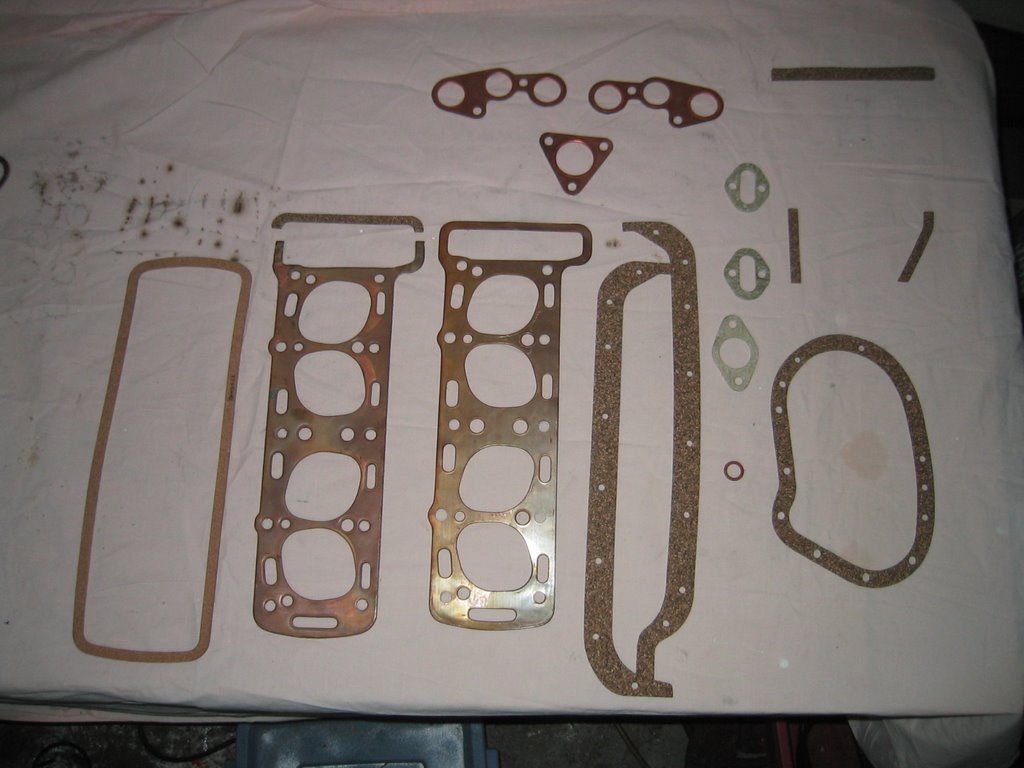
There would be no point in reusing the old gaskets in a rebuild! So a trip to the local Heverly Singer Emporium was necessary to equip myself with a complete decarbonizing set of gaskets. This would set me up with gaskets for the valve cover, head (copper), timing gear cover (left and right), water manifolds (upper and lower), exhaust and down pipe (copper), timing chain cover and the three needed for the sump pan.
There are two types of head gaskets available. One is the original type (to the right in the photo) with a complete copper "circle" around the timing chain tunnel. The later model (to the left) does not extend completely around the timing chain tunnel but provides a cork/rubber gasket to complete the seal. In either case, a lot of attention needs to be given to this area as it has proven, to me anyhow, to be one prone to oil leakage.
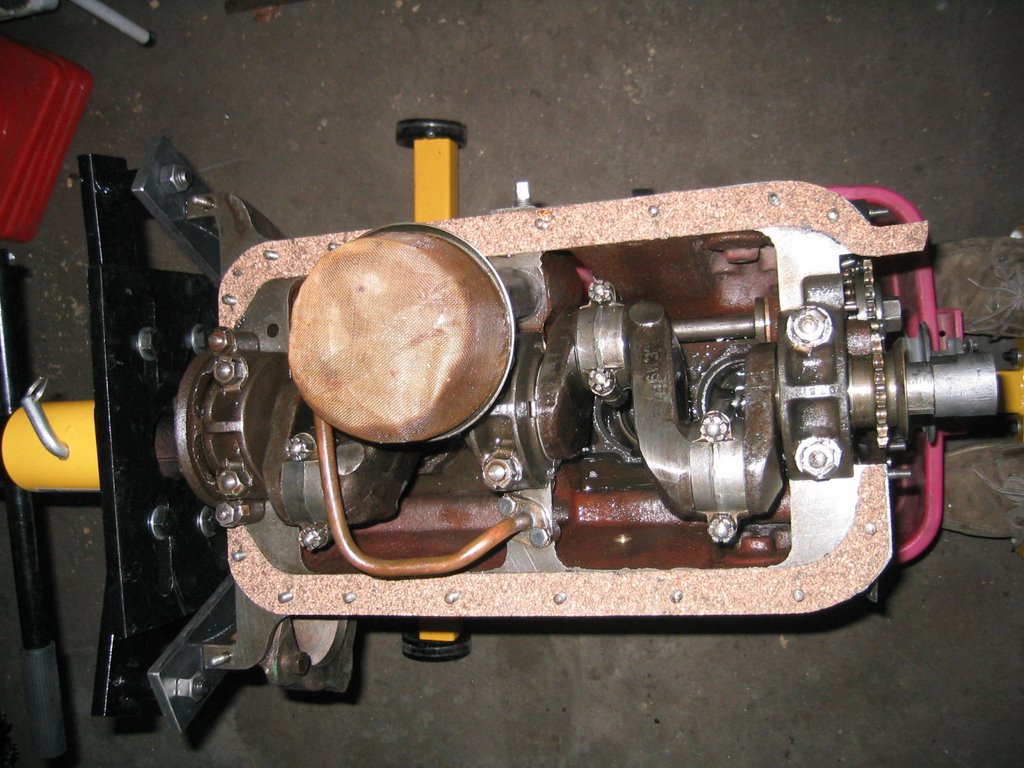 I started with the sump pan gaskets. They are split between left and right with a thick "block" of gasket material for the rear bearing. I apply a thin layer of gasket cement. I use the kind that remains flexible. The trickiest part here is in the gasket for the rear bearing. I bit more gasket cement on the bearing housing itself AND at each end of the gasket. The gasket should form around the housing and the ends meet up with the gaskets that follow the bottom of the block. Even so, a little extra goop to ensure a better seal is worth it in my opinion. Eventually you will be able to get the sump on. After it has had a chance to settle, I will come back later and clean everything off.
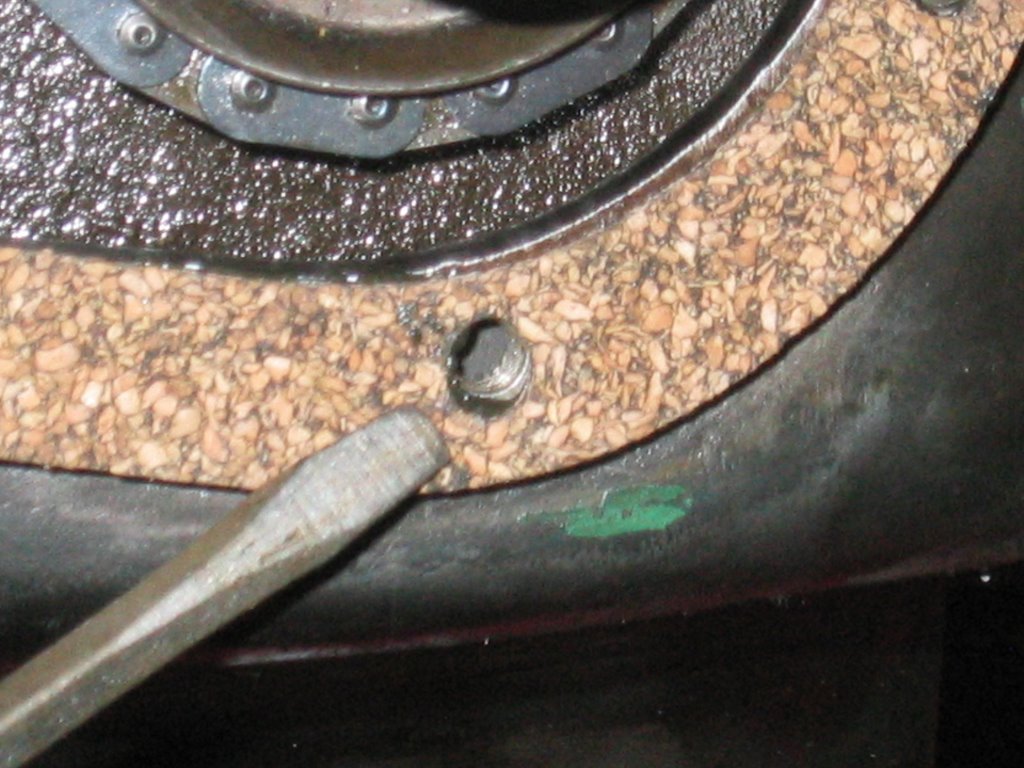 Tightening the nuts here is a delicate affair. Just enough pressure, but not too much. Because of this "flexibility" in the final height of the sump, the lower four holes in the timing chain cover gasket are oval. Smart thinking Mr. Singer Engine Gasket Designer Person! If you bought your gaskets, you may have to trim the tab on the forward right side gasket that protrudes from the front of the partially assembled block.
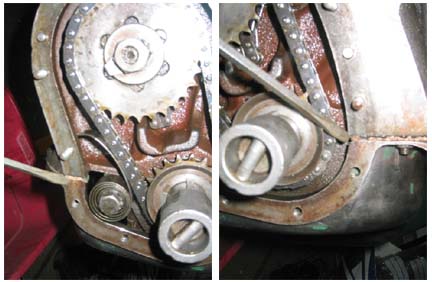 Another potential oil seepage location is the point where the sump gaskets meet the timing cover gasket. If the sump gaskets do not come flush with the face of the block then an extra bit of gasket goop will be necessary. Again, a thin bead of gasket cement and sufficient tightening of the cover nuts and bolts and this part is done!
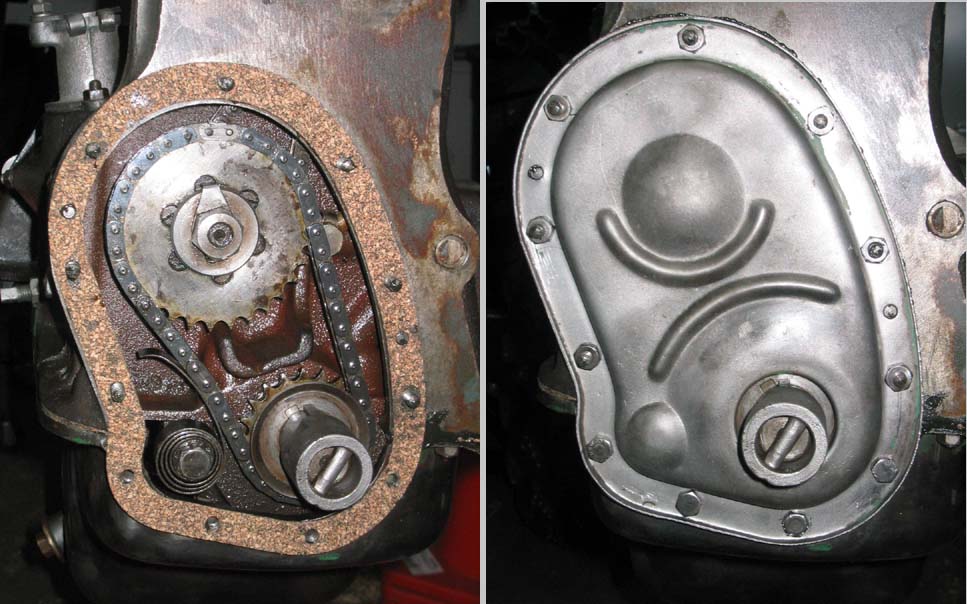 All that is left to do for now are the gaskets for the upper and lower water manifolds. These gaskets are normally of a solid gasket material so a bit more torque can be applied.
I had to make a couple of gaskets for my engine rebuild project: oil line from the pump to the block, petrol pump and the distributor housing. Making these and other gaskets is easy.
 First I cut a piece of gasket material in the rough shape of what I will need. Then, placing the material over the area I want the gasket for, I rub the edges of the facing (metal part to be "gasketed") to leave an impression on the gasket material. I cut out the necessary areas, punch out holes if necessary and voila! There are times when I will punch out stud holes before rubbing. This is used when the studs can not be removed, or they are impractical to remove. In the example pictured here, I chose to punch the holes first.
Before I install the distributor housing, make sure that you put in the distributor-oil pump-petrol pump drive shaft. With all the things that this little baby does you better NOT forget it!! When installing this drive shaft, you will have to play with it to A) line up the oil pump drive so that B) the offset slot in the distributor drive end is furthest away from the block.
WOW
To do this seemingly impossible task, I first dropped in the drive shaft in place (gently of course) so that the distributor end was roughly in the right position.
 Then using the starting handle, I turned the crank until the drive shaft found its mark with the oil pump. This causes the drive shaft to drop to its normal level. I then turn the crank shaft until the cam shaft is back to its initial position (Smiley Face). Check and make necessary adjustments to the drive shaft (turning the crank if necessary).
The next gasket to install is the copper/asbestos head gasket. That will have to wait for me to install the valves! (Hint - Part 8? perhaps?)
3 comments:
Hi
I am building a singer 9 special and am in need of a complete gasket set. Would you know is the gasket sets you show in your blog are still available?
Excellent read, Positive site, where did u come up with the information on this posting?I have read a few of the articles on your website now, and I really like your style. Thanks a million and please keep up the effective work.
engine overhaul gasket set
Post a Comment