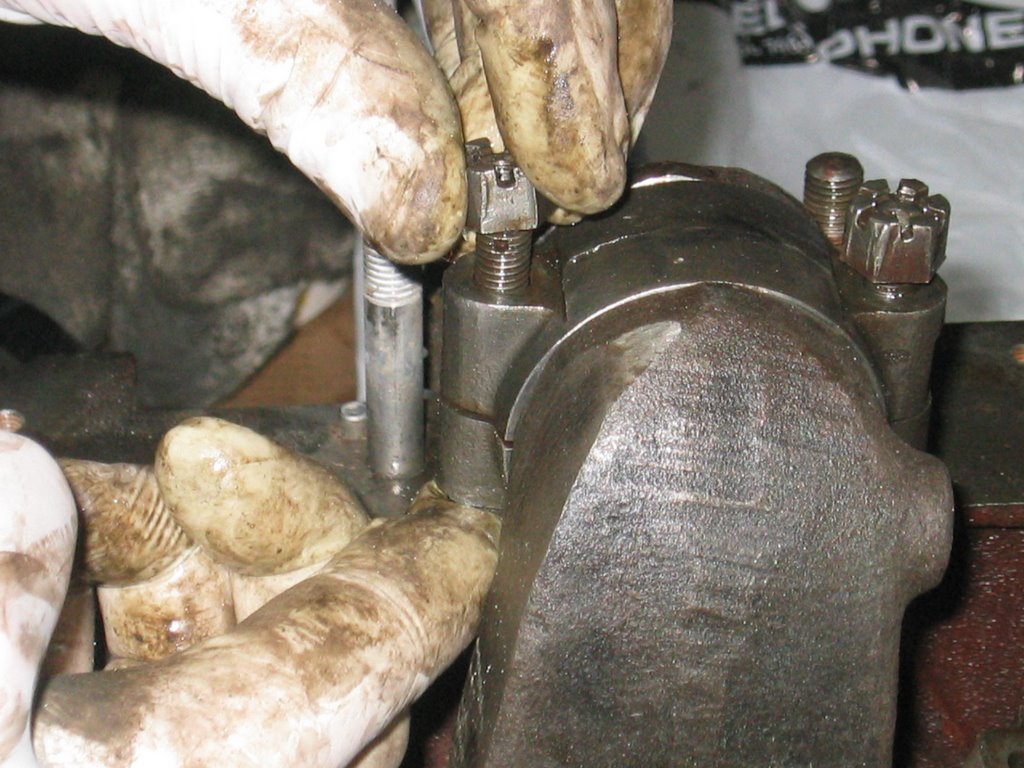
 Castelated nuts.. too cool!
Before we leave the crank alone, we need to attach the connecting rods!
Again lots 'n lots of oil here. I had a bit of fun filling up the oil journals running through the crank. You see that they flow from the middle main bearing (where the oil is pumped) through the journals in the crankshaft to the big end bearings of the connecting rods
 and then back to either the forward or aft main bearing. You see how important it is to have a steady and uninterrupted flow of oil flowing through these critical areas.
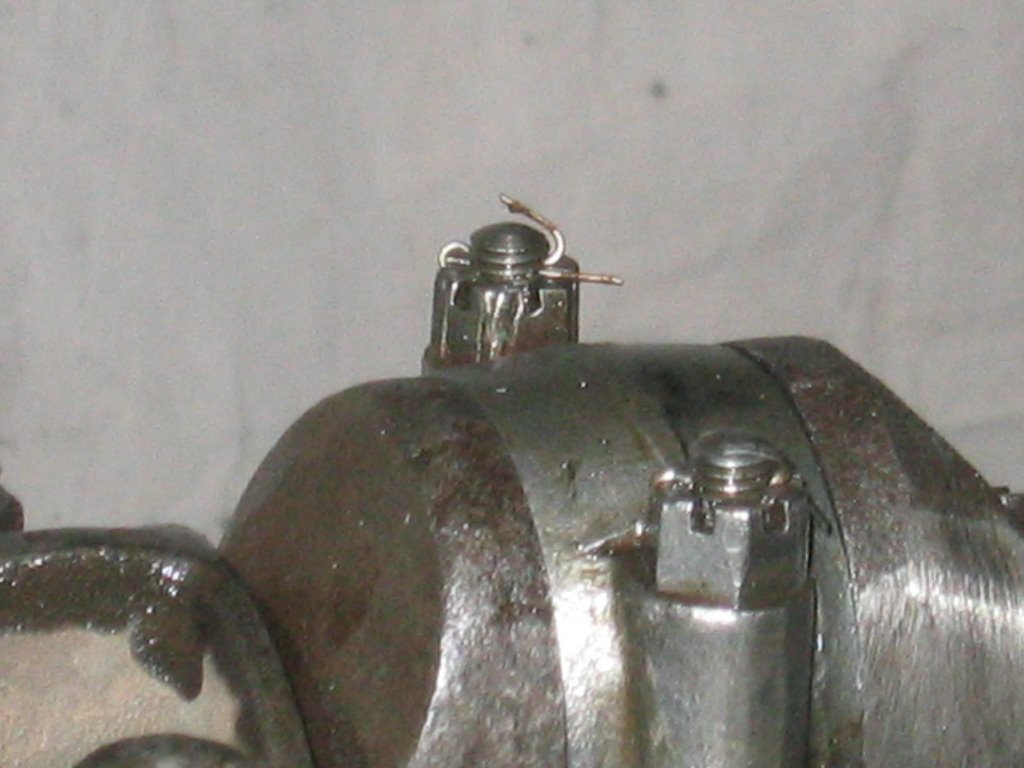
Each castlated nut is toppped off with a split pin. My other engine's big end nuts were secured with finnishing nails. Cheap, but with these precious darlings, I do not want to take any chances!
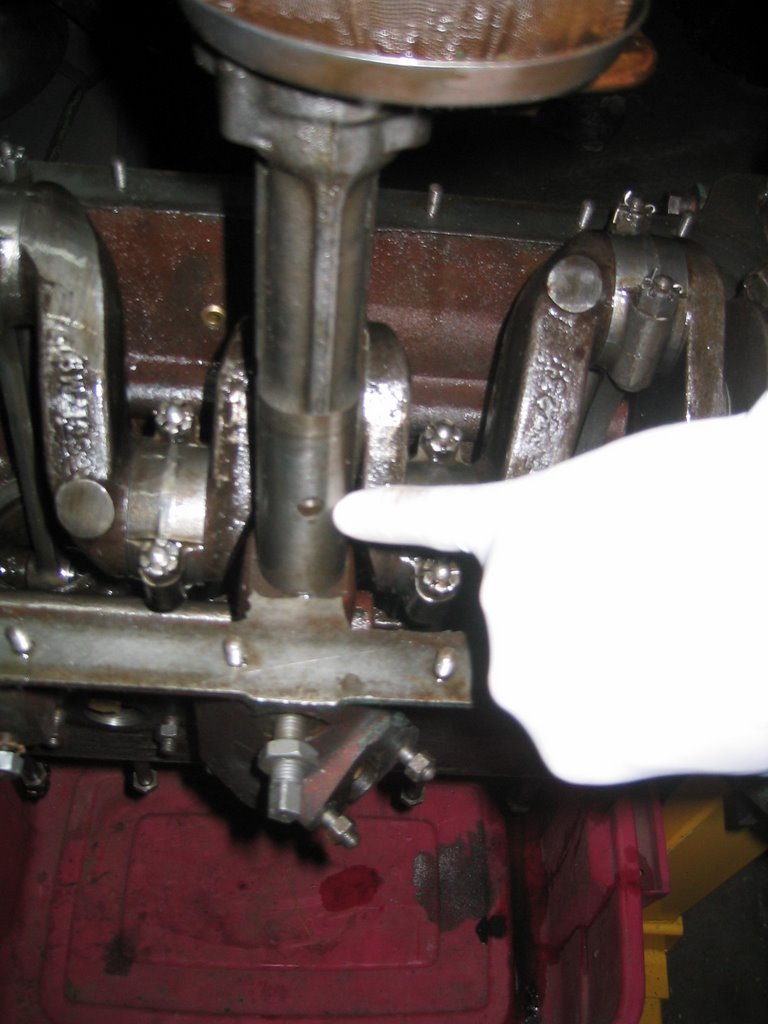
 With all four connecting rods now secured, I could not help but give the crank a few spins. NICE! I do not want to overdo it though as I am using up the oil that has been trapped by the assembly process. For a more permanent solution, I have to get the pump set up.
This is a simple case of lining up the hole in the shaft with its retaining screw in the block. This system is very good in ensuring that the assembly lines up correctly. Once the hole is aligned, then tighten up the set screw and secure it in place with the nut. There is no way that things will move now!
The height and alignment of the oil pump shaft is important. first, it must be aligned so that it does not interfere with the crankshaft. It also holds the pump and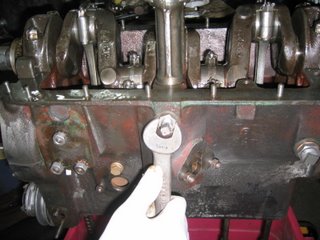 distributor drive shaft. This shaft is itself driven by the intermediate timing shaft that is driven by a chain running off the crankshaft. A second gear on the intermediate shaft runs up to the camshaft, and we know how important that is.
Now we are ready to look at the front of the engine. A lot is going on here and the order of assembly is important. I forgot to installthe oil feed pipe for the head before I put in the intermediate gear. No degree of fittering about would get a satisfactory result so it was off with the shaft and start over again. I was glad that I did. I would not have forgiven myself if a problem with the engine was as a result in trying to skip or rush steps.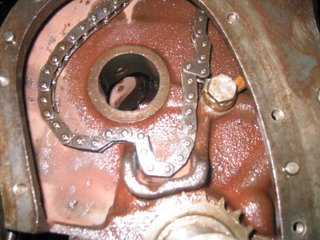
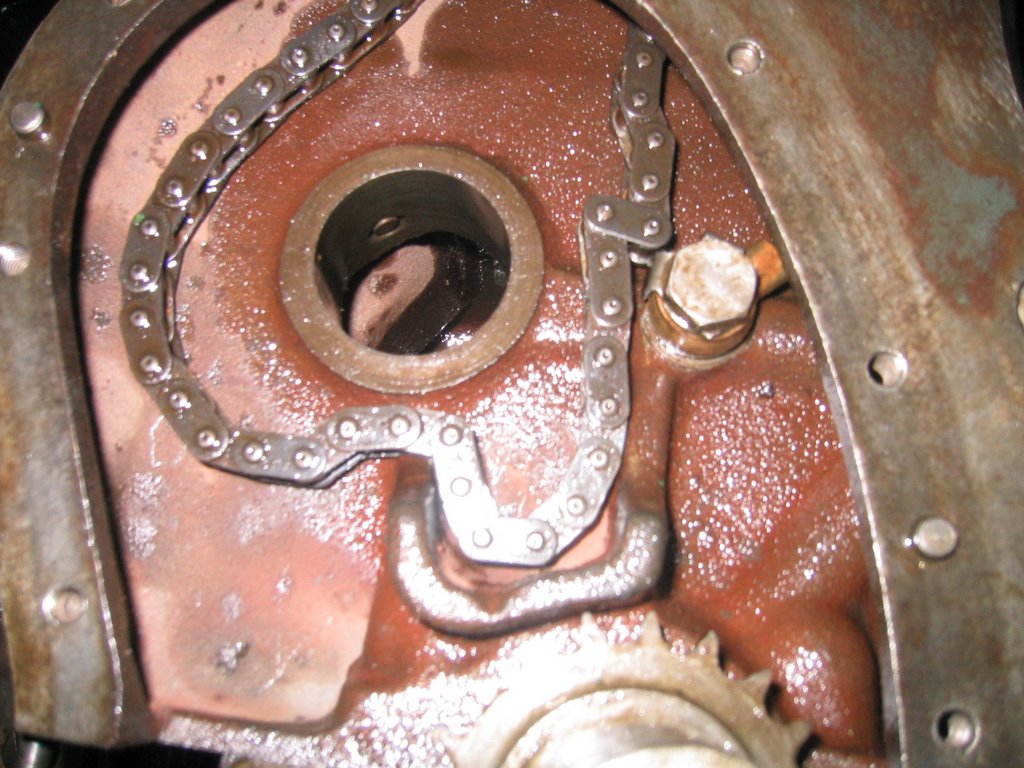
Oil feed pipe and cam chain. You can see the end of the set screw in the hole for the intermediate gear bushing
So with the oil feed pipe in place, I could drop in the cam drive chain and install (again) the intermediate shaft and gears. There is a large bushing at the front of this assembly that too lines up with a set screw. To get a rough idea on where to align the hole, use the cast oil channel to align up the oiling hole. Be sure that you have the correct hole! The set screw hole has a chamfered edge that accepts the set screw. The other hole allows oil (again) to pass though the bushing.
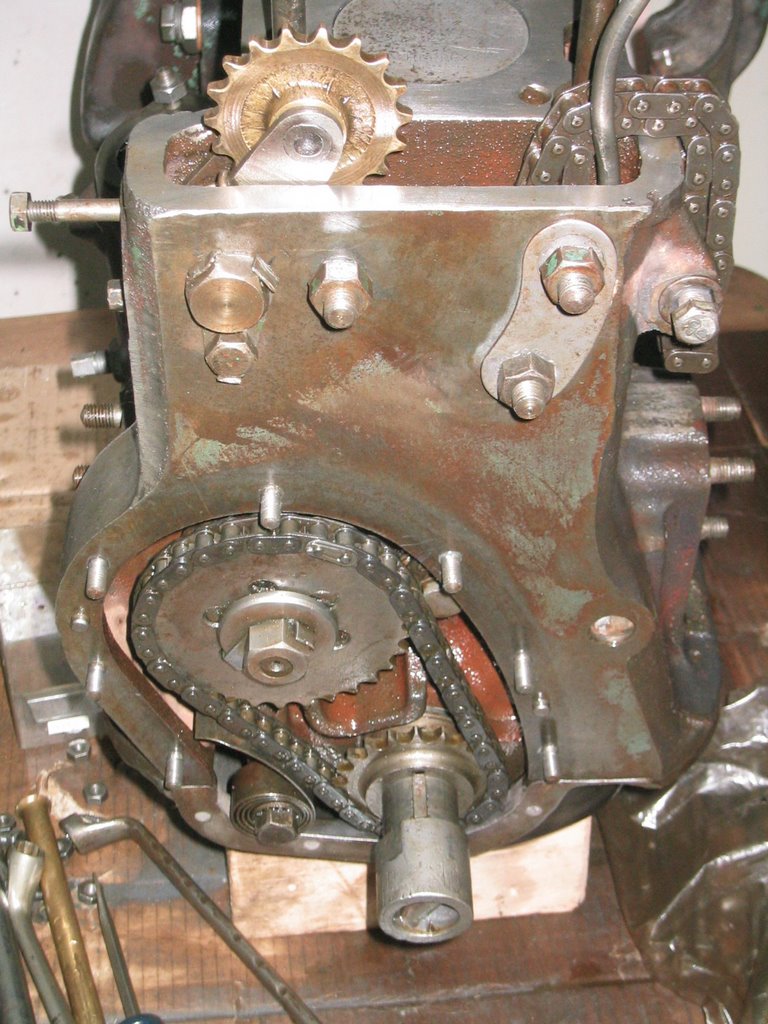
The chain tensioning spring is now installed to reduce the slack in the primary chain. This one was a bit of a pain to install, but with some perserverance it will set in. You will notice the oil pan in this photo. I temporarilly installed it to keep unwanted dust, grit and/or sand getting into the sensitive bottom of the block.
The last job for this day was to install the cam chain tensioner. This little darling also has a spring that is held in place by the lower (smaller) bolt. After placing the bolt retaining washer, I attached the lower bolt first. Then using a screw driver to exert a bit of leverage, I managed to insert the upper bolt and voila! I was almost tempted to polish the bronze gear, but with time running short and the mere fact that noone would see it, I decided agains it..
 With all four connecting rods now secured, I could not help but give the crank a few spins. NICE! I do not want to overdo it though as I am using up the oil that has been trapped by the assembly process. For a more permanent solution, I have to get the pump set up.
This is a simple case of lining up the hole in the shaft with its retaining screw in the block. This system is very good in ensuring that the assembly lines up correctly. Once the hole is aligned, then tighten up the set screw and secure it in place with the nut. There is no way that things will move now!
The height and alignment of the oil pump shaft is important. first, it must be aligned so that it does not interfere with the crankshaft. It also holds the pump and
 distributor drive shaft. This shaft is itself driven by the intermediate timing shaft that is driven by a chain running off the crankshaft. A second gear on the intermediate shaft runs up to the camshaft, and we know how important that is.
Now we are ready to look at the front of the engine. A lot is going on here and the order of assembly is important. I forgot to installthe oil feed pipe for the head before I put in the intermediate gear. No degree of fittering about would get a satisfactory result so it was off with the shaft and start over again. I was glad that I did. I would not have forgiven myself if a problem with the engine was as a result in trying to skip or rush steps.
Oil feed pipe and cam chain. You can see the end of the set screw in the hole for the intermediate gear bushing
So with the oil feed pipe in place, I could drop in the cam drive chain and install (again) the intermediate shaft and gears. There is a large bushing at the front of this assembly that too lines up with a set screw. To get a rough idea on where to align the hole, use the cast oil channel to align up the oiling hole. Be sure that you have the correct hole! The set screw hole has a chamfered edge that accepts the set screw. The other hole
 allows oil (again) to pass though the bushing.
The chain tensioning spring is now installed to reduce the slack in the primary chain. This one was a bit of a pain to install, but with some perserverance it will set in. You will notice the oil pan in this photo. I temporarilly installed it to keep unwanted dust, grit and/or sand getting into the sensitive bottom of the block.
The last job for this day was to install the cam chain tensioner. This little darling also has a spring that is held in place by the lower (smaller) bolt. After placing the bolt retaining washer, I attached the lower bolt first. Then using a screw driver to exert a bit of leverage, I managed to insert the upper bolt and voila! I was almost tempted to polish the bronze gear, but with time running short and the mere fact that noone would see it, I
 decided agains it..
No comments:
Post a Comment