Before we even think of opening up a tin of paint we must be sure to get ALL traces of oil and grease off the engine. A good scrubbing with soap and water and a thorough drying is the first step. As a big fan of Por 15 products, I use their Marine Clean for this step. Then I spray with a liquid metal prep formula. Again I use a product from Por 15 called Metal Ready. It is a blue liquid that has a mild etchant that chomps away at the metal surface and leaves a light coating of zinc phosphate that helps in the adhesion of the paint. I use a spray bottle and wear rubber gloves for any processes where my hands come in contact with any etching chemicals.
Keep the surface moist for a few minutes to allow the process to work and then we rinse off the Metal Ready. If we do not rinse off the metal then a powdery residue will be left on the surface of the metal. Any residue that appears can be removed with a damp rag.
The Metal Ready is also handy to removed rust from small parts. Simply pour some Metal Ready into a small dish and immerse the part(s) in it. Be careful to not leave them in too long as the etching process will eat deeper the longer the longer the part is in the solution. After everything is dry, the painting process can begin.
I was at a loss as to what colour to paint the engine. I decided to go for as original as possible. Pre-war Singer engines were painted black... probably to disguise traces of oil. Post war Singers featured engines painted in a brown oxide. From what original engines that I have seen, it looks like the engines were assembled (except for the ancillaries) and completely painted in the brown oxide paint before being installed. I too saw the reasoning in painting the entire engine as one assemble, but I did reserve the right to add some "bling".
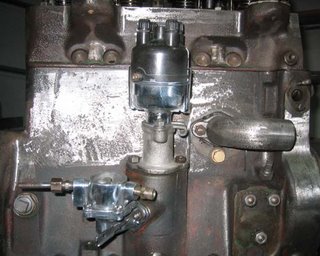 I sand blasted the alloy fan pulley and left it as is. The rest of the fan assembly was painted black. The petrol pump and distributor were cleaned off and, well, polished. I was surprised at how shiny they could get! I decided too to top the engine off with a black valve cover. That was pretty much it for colour here.
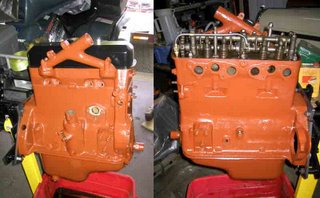 Brown oxide engine paint being impossible to find in my area. I even went to a local shop that would mix me up a batch... at almost $300. I had almost given up when I was offered some 2 part red oxide epoxy by Mr. Phillip Avis. Looking at the dots of paint that had dried on the tins from a previous job, I figured that the colour was close enough for my purposes. I mixed up a batch of about half a can of Coke (or Mountain Dew), and was able to paint the engine and transmission and more!
 The paint went on smooth and covered well. Four hours later it was dry to the touch in most places, but with any 2 part paint (especially old stuff) I will give it 24 hours before taking another look.
 The other engine parts that I had yet to mount on the engine were also painted. I would give them a coat of paint and later install them on the engine before giving everything a second coat.
In the mean time I would give the ancillaries their coat of black paint.
No comments:
Post a Comment