 One of the main bearing pairs.
Main bearings are "sided". The top half has two holes that allow oil flowing through the crank to also pass through the bearing. It is obviously important that the correct half of the bearing be placed in its corresponding socket. I made a point of writing the word "Bottom" on the bottom half of each bearing. Also, when I disassembled the block, I lightly oiled the bearings and placed them in a numbered baggie. I hope that you like oil! I use a lot in the rebuilding process. Prior to installing them I add oil to all the surfaces that will touch the bearings.
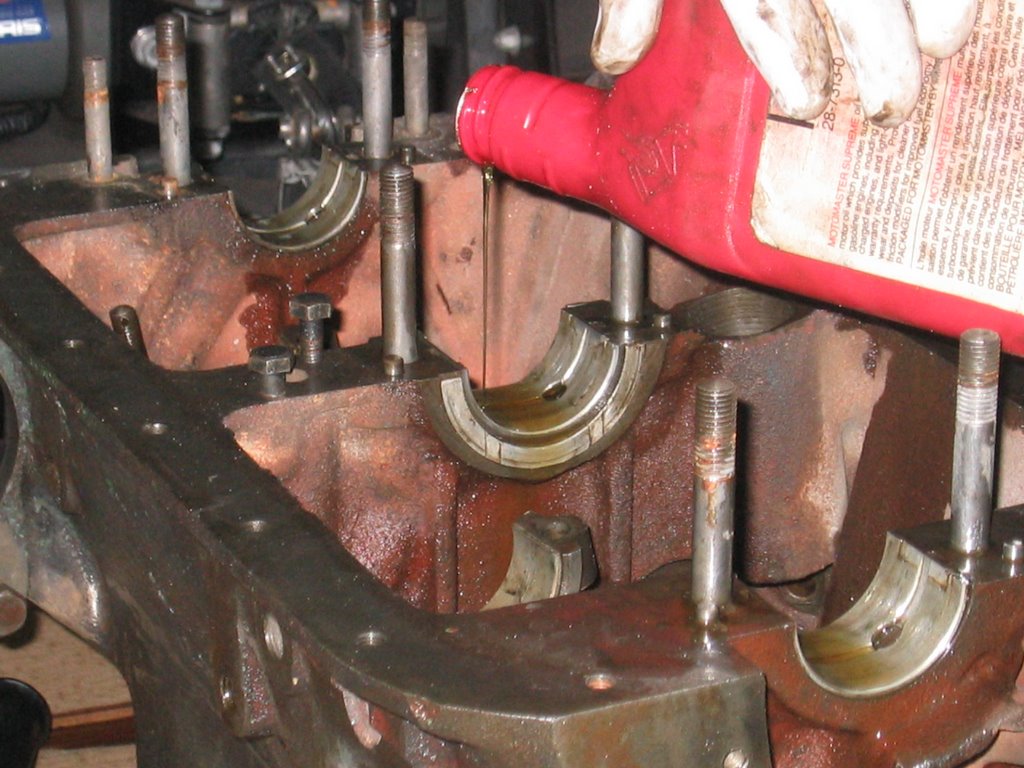 Oil that is... Texas tea...
With the life of the crank and connecting rods dependent on a continuous flow of protective lubricant, be sure that the oil journals are clear of any blockages and/or debris of any kind.
Now, with the bearings (and the center thrust bearings) installed I add copious amounts of oil to the bearing surfaces before dropping - GENTLY - the crank in its place. Early engines had white metal bearings. Indeed, up to the A series Roadster and 10 engines, big end bearings for the rods were still white metal. As always, show great care whenever dealing with bearings and or the machined surfaces.
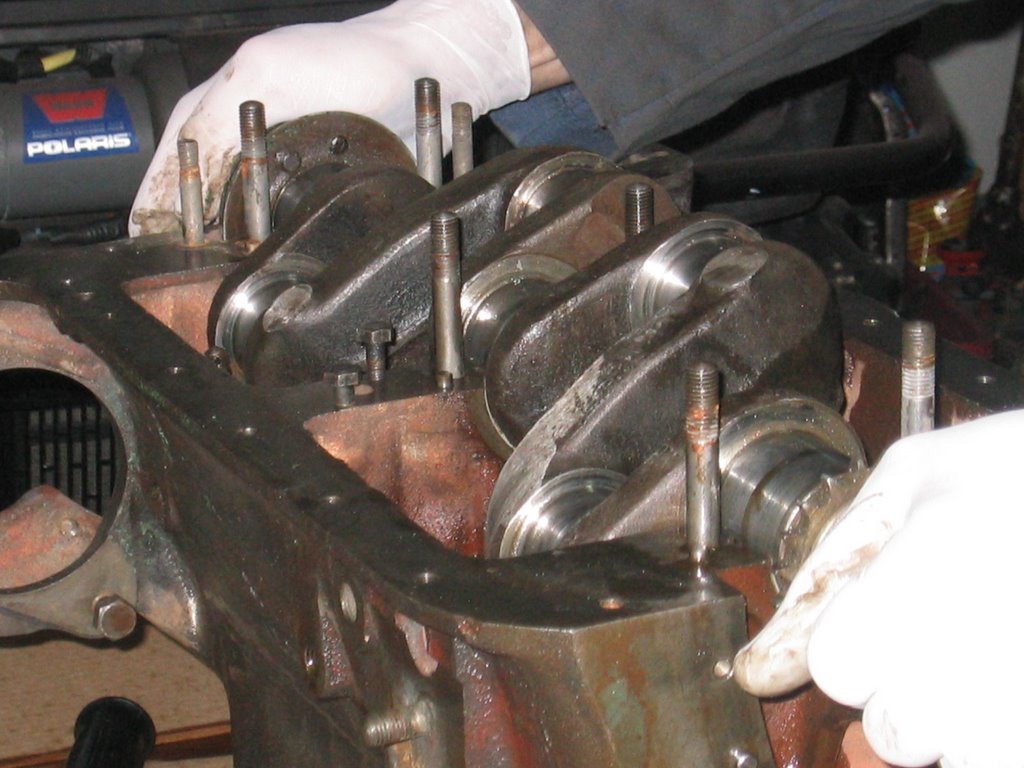 Gently... gently... gently...
Start off by moving the connecting rods to one side of the crank case. We would not want to have them interfering with our delicate placement of the crank shaft now... would we?
With the crank snugly in place we can now go about the installation of the bearing caps. Again, lots 'o oil here. We will be turning the crank a few times during the rest of the installation process and we must get that precious slick liquid in as much as we can. Each cap is different and sided (forward - aft). To help insure that the caps are installed correctly pins on the crank align with holes on the cap. Place the flanged locking washers and the nuts to each cap. When you disassembled the crank you surely noticed that the nuts for the caps were thicker than your average nut. These allow for the extra torque that will be put upon them in their role of harnessing all that power!
 Careful... careful... careful...
With very little on torque settings for Singer engines, I turned to an article on torque values for head nuts. While they reside at the northern hemisphere of the engine world their size is the same. So I tightened them to 30 foot pounds in two steps. This is a good practice when tightening nuts and/or bolts that attach a piece to a machined surface. An even snugging-down process is a good way to avoid any excess warpage.
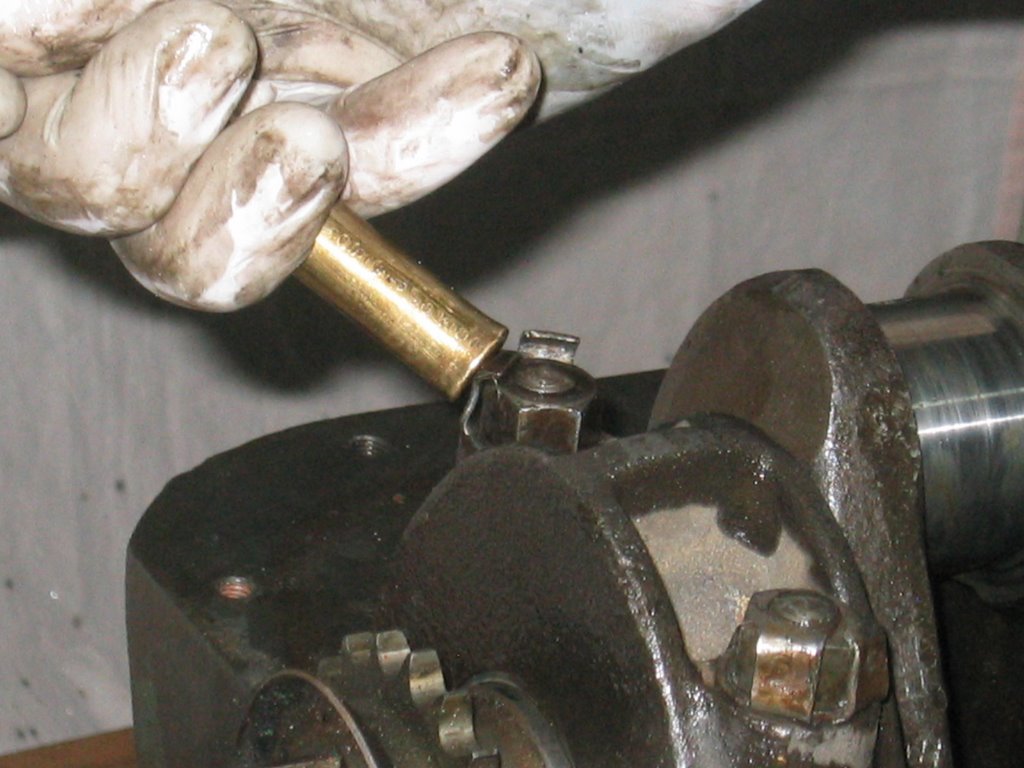 Thet's enough movin' fer yoo mate!
Once the cap nuts are sufficiently tightened, we must make sure that they remain in place. Because we were sure to remember to put the locking washers on before the nuts, we can tap the tabs against the nuts. I use a brass punch so I do not take the chance to marr the edges of the nuts.
No comments:
Post a Comment