
 There is no sense in having a shiny petrol pump and carburetor without something to link the two together! How about a nice copper tube? Yes you say, well let's get to it!
The engine that I am rebuilding came with a perfectly good petrol pipe. It also came with an unknown Solex carb. The pipe was definitely made to fit the carb option. My setup features a SU Down draft (see Part 12) so there were a few issues to deal with. First was that the pipe was a bit too short, the other was the carb connector. I wanted to use the banjo connector that was originally with this carb. I think that they are cool, and for that reason I will take the hours and hours to painfully reconstruct a new pipe. Actually it too less than 20 minutes from start to finish, but do not tell anyone.
I started by straightening a piece of coiled copper pipe. Copper is great because it is able to take a bend rather easily. This also means that care must be exercised so as not to kink the pipe.. Being the ever nit picker, I evened out the bumps by rolling it on the floor of the garage under a piece of ply. If you have ever made snakes out of clay as a kid, you see what I did. No measuring yet, but I did make sure that the pipe was definitely long enough.
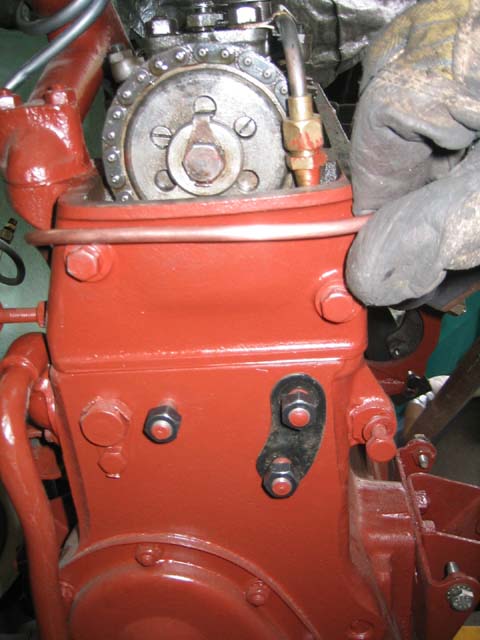
Then I made the fitting for the pump-end of the pipe and attached it to the petrol pump. From there I gently bent and curved the pipe to follow the ins and outs as well as the ups and downs and the spins to follow the curves of the engine. I used the original pipe as a guide especially to see where the pipe passed under the lower water manifold and around the breather tube.
 During much of this process it was necessary to remove the pipe, make a bend reinstall the pipe, and so on Do not forget to add the clip for the front of the pipe. The clip secures the pipe in place by using one of the bolts that secure the front head cover. This is a crucial part since we would not want our smart looking petrol pipe to bang into the whirling fan.
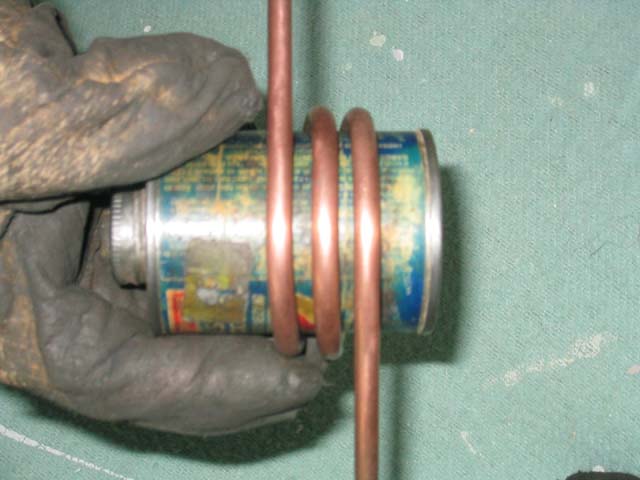 The original pipe featured a single loop on the carburetor side of the engine. I wanted to add an extra loop based on a few photos of other cars of that era. Weather it is right or wrong, the difference will not be felt by the system. I also paid extra attention to the distance that the petrol line comes to the exhaust manifold as this is the area where the loop would be. Perhaps the Singer designers thought that this would pre-heat the petrol.
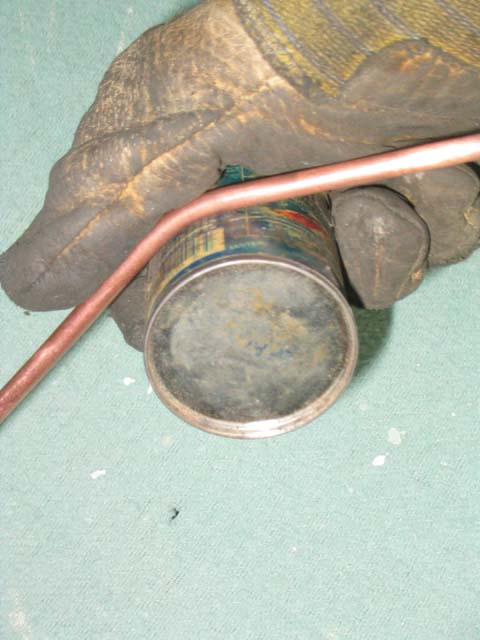
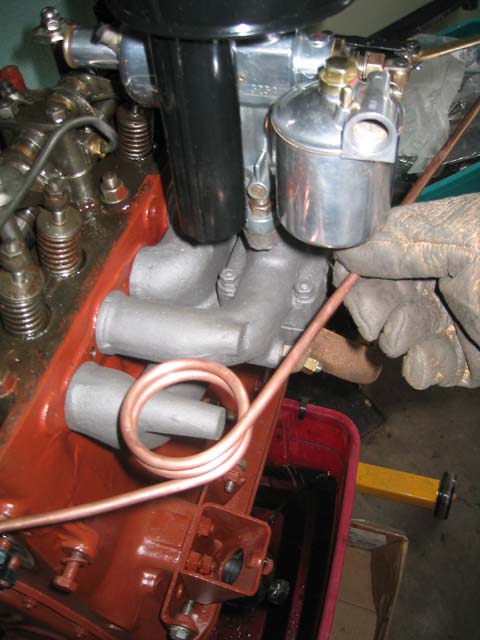 Making the loops was a snap... with the right tools (in this case a can of anti-seizing compound). I wrapped the pipe around the can (twice) and simply removed the can. The result is quite nice.
Then another bend to bring the pipe up to the carb. With the banjo in place, the bend was made and then the pipe measured for cutting.
Again a fitting session with the banjo in place and the pipe inserted. Any final adjustments can be made to the length of the pipe.
 Once everything is as we want it to be, I mark the pipe and banjo so that they can be aligned properly when joined permanently. A quick soldering job (another nice thing about using copper) and we are done!
A pass or two with some steel wool was just the trick to make it look nice.
Getting closer!
3 comments:
Could you please tell me how is the copper pipe connected to the mechanical petrol pump. My 1948 Singer 9A uses a flexible plastic pipe between the petrol pump and the carb, which obviously is a modification. The fuel pump has a 1" long copper pipe at the outlet and the plastic pipe is inserted on to the copper pipe. I would like to revert to the original copper pipe fitting. Also may I know the inner and outer diameters of the copper pipe, approximately.
In order to do this kind of modification, do you need to have any special engine rebuilding equipment?
Post a Comment